Using a sander effectively can transform your woodworking projects, ensuring a smooth, professional-looking finish. Whether you’re a seasoned DIY enthusiast or a beginner looking to improve your skills, understanding how to use a sander is crucial. This guide will walk you through essential tips and techniques to get the most out of your sander, whether you're working on furniture, cabinets, or home improvement projects. Let’s dive into how to master the art of sanding.
Know Your Sanders
Before you get started, it’s important to understand the different types of sanders available:
- Belt Sanders: Ideal for large surfaces, they remove material quickly but require a steady hand.
- Orbital Sanders: Great for achieving a smooth finish on flat surfaces; they are versatile and easy to handle.
- Detail Sanders: Perfect for intricate work, these sanders are designed for tight spaces and corners.
- Random Orbital Sanders: Combining the benefits of both belt and orbital sanders, they provide a swirl-free finish.
Choosing the right sander for your project will set the foundation for a successful finish.
Select the Right Sandpaper
Not all sandpaper is created equal, and selecting the right grit is crucial:
- Coarse Grit (40-60): Use for heavy material removal, such as stripping paint or smoothing rough surfaces.
- Medium Grit (80-120): Good for general sanding and preparing surfaces for finishing.
- Fine Grit (150-220): Ideal for final sanding before applying a finish to ensure a smooth surface.
Always start with a coarser grit and gradually move to finer grits for the best results.
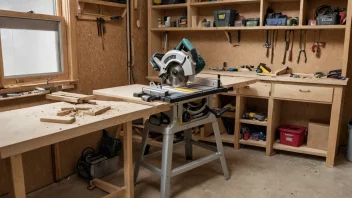
Prepare Your Workspace
A clean, organized workspace is essential for effective sanding:
- Clear the area of any debris and dust to prevent contamination of your workpiece.
- Ensure good lighting to see imperfections and uneven surfaces clearly.
- Consider using a dust extraction system or a vacuum attachment to minimize dust and improve air quality.
Preparation can make a significant difference in the quality of your final finish.
Technique Matters
Proper sanding technique is key to achieving a professional look:
- Sand with the Grain: Always sand in the direction of the wood grain to avoid scratches.
- Keep the Sander Moving: Avoid staying in one spot too long to prevent uneven surfaces or gouges.
- Apply Even Pressure: Too much pressure can cause the sander to dig in, so let the tool do the work.
Practice these techniques to enhance your sanding skills and achieve a flawless finish.
Finishing Touches
Once you’ve sanded your project, it’s time to apply the finish:
- Clean the Surface: Wipe down the wood with a tack cloth to remove any dust particles.
- Choose the Right Finish: Depending on your project, consider options like varnish, stain, or paint.
- Apply Even Coats: Use a brush or cloth to apply your finish in thin, even layers for the best results.
Taking the time to apply a proper finish will enhance the beauty and durability of your work.
In conclusion, mastering the use of a sander can greatly enhance your woodworking projects, giving them a professional finish that reflects your skills and attention to detail. By understanding the different types of sanders, selecting the right sandpaper, preparing your workspace, employing the correct sanding techniques, and finishing with care, you’ll be well on your way to achieving stunning results in all your DIY endeavors.